How to Solder Electronics
For those of you who follow my blog Talk Circuits, you may have seen my most recent blog about the basics of building circuits, which included a small circuit on powering an LED light through a resistor. I made this circuit on something known as a “breadboard.” No, it is not what it sounds like and has nothing to do with any carbohydrates. A breadboard is a quick way to test circuit designs. This method of circuit building is very temporary and is done before making a circuit more permanent by soldering the pieces together. I thought that for any tech-enthusiast, soldering is very helpful skill to learn and it would be a good topic to teach.
The supplies you will need will consist of the following:
- A soldering iron, stand, and solder
- A PCB holder (circuit board clamp)
- Wet sponge
- Wire Cutters
- Safety Glasses
- Gloves
I would first like to warn all readers that working with a soldering iron can be very dangerous and should be handled with great care. These tools work by becoming hot enough that they melt solder to a liquid and have the capability to reach temperatures of 450 degrees Celsius. If you do not feel comfortable working with a device at these temperatures, please do not attempt to solder. Additionally, solder contains lead and will start to fume during the process of heating it up with the soldering iron. This is why it is extremely important to solder in a very well-ventilated area (or use a solder fume filter) and avoid inhaling any of the fumes that come off of the solder.
The first step to working with a soldering iron is to add solder to the heating tip in a way that is known as “tinning.” Because the soldering iron is so hot, is it very susceptible to corrosion. By adding a layer of solder, the tip of the soldering iron is covered and be protected.
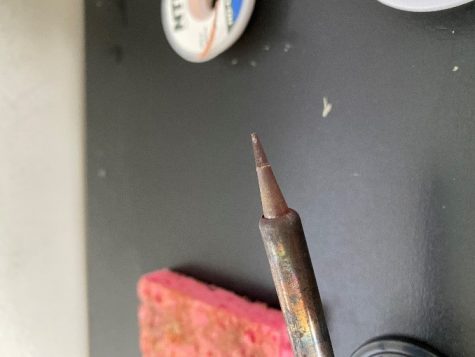
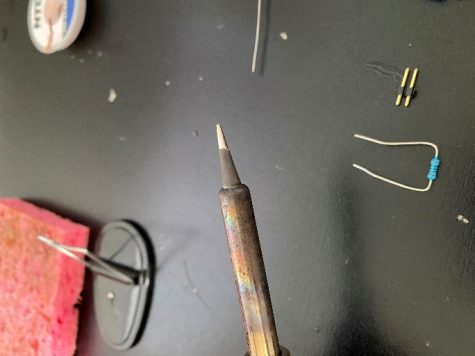
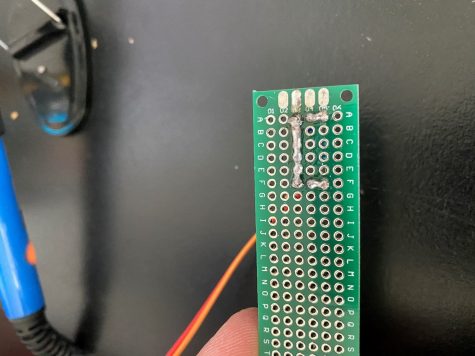
Now is the time to put on the safety goggles and gloves. To tin the tip of the soldering iron, plug in your soldering iron, grab the grip (avoid touching the metal, as it heats up), and add a little bit of solder to tip until it shines. I personally like to do this twice and wipe the tip with a soaking sponge quickly in order to get all of the gunk off of the tip. The second step is to insert the components into the PCB (printed circuit board) and pull the metals leads through the holes in the PCB and bend the metal leads so the component stays in place as seen below. I also attach a metal clip to the lead I am about to solder so that the heat distributes more and does not damage the component. After I have the component in place, I attached it to my PCB clip on the stand.
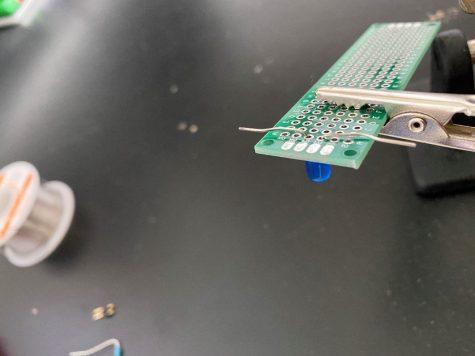
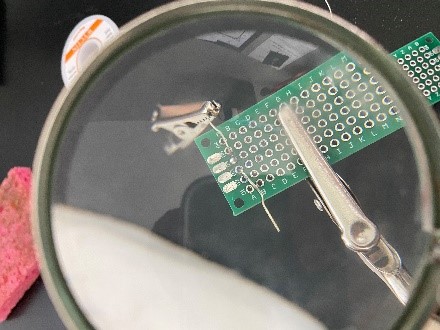
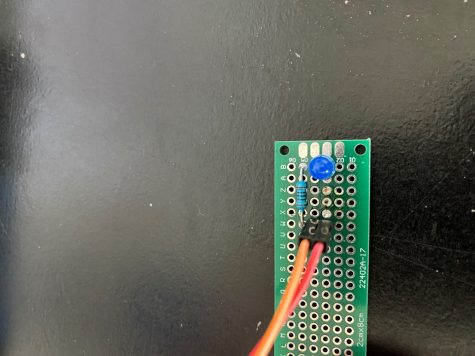
Finally, it is time to solder! With your soldering iron in one and solder spool in the other, gently apply the tip of the soldering iron to the copper surface of the hole and the component lead you are soldering. While holding the tip in that positions, apply the string of solder to the other side of the copper ring near the base of the PCB. This should cause the solder to liquify and flow around the hole. Continue to add solder until the joint looks like this:

Congratulations, you just made your first solder joint! Take your wire cutters and clip off the exposed metal leads of wire above the solder and repeat for the hole on the left.
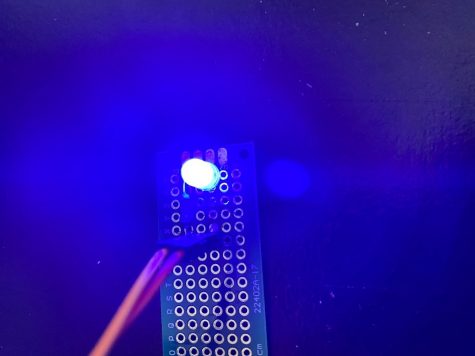
Repeat this process for every component safely and with caution and make sure to turn off the soldering iron whenever it is not in use. For my personal project I displayed in my blog yesterday, this is the resulting circuit now soldered to a PCB:
After your project is complete, make sure to turn off your soldering iron and clean it with wet paper towel until it gets the shiny tip that it had when tinning. I do this while the iron is cooling down, so it does not have time to oxidize. After all of the supplies are cleaned up, make sure to wash your hands. Then your newly soldered product is ready to enjoy.
Grade 12
Interests- Involved in the Technology Student Association, Pennridge Men's Volleyball team, National Honors Society, and Executive Council.
Hobbies-...